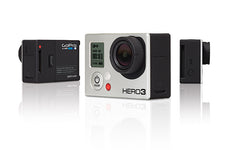
Setting up the GOPRO HD HERO3 Black for Skydiving
Posted by Mark Kirschenbaum on
The number one question I get now-a-days is, "Trunk, what mode should I set my Gopro 3 in for skydiving?" The purpose of this article is to shed some light on this question and help you figure out what is the best mode for your circumstances. I will also link some great articles for those who wish to learn more. Finally, the biggest issues with this camera will be combated and hopefully give you a better understanding of what to do to get the best footage possible. As always, I will continue to update this document as updates become available, I shoot more with the camera, and of course get your feedback below.

The first question I ask the user is, "What are you doing with this footage?" This is very important since some modes will not readily playback on some slower computers, media centers, tablets, and even directly from the camera. With this knowledge you will be able to figure out what is the best mode for yourself. Keep this in mind while reading this document!
Behind your actual flying and filming ability, how you setup the camera is the biggest determining factor to how your footage will appear. GoPros are great since they give the customer a ton of customization power. However, with 137 different filming options, it is overwhelming even to the seasoned veteran. Just know, that each one of these options has its sweet spot and not all of them are for the sky. Lets start from the beginning since 4K is fairly new to all of us.
Frame Size
You've heard that the GoPro HD HERO3 Black can shoot up to 4K, but what does this mean? For those that don't know, this is the number that designates the video resolution much like a digital camera has a megapixel specification. The higher the number, the more pixels exist in each frame of the video. The GoPro HERO3 Black can shoot in 4K, 2.7K, 1440, 1080, 720, 960, 848. Wow, a lot of modes! Luckily, Abe Kislevitz made this awesome graphic below showing the comparison between frame sizes. Think of the 4K as a picture of something and everything else a crop of the original box.

Aspect Ratio
You will notice that everything except 1440P and 960P looks to be scaled from one another. This is because they are of a 16:9 aspect ratio much like your "widescreen" TV, monitor and perhaps even your laptop. Looking back at the 1440P and 960P these are in what's called a 4:3 aspect ratio. The 4:3 aspect ratio, or letterbox, is similar to your old CRT and analog TV. The similarities stop there because these modes produce great footage, but they just arent widescreen. The difficulties lie when one person at a boogie is shooting at 4:3 and everyone else is shooting at widescreen. The editor must go and crop or do some wizardry to each one of your videos to make it fit their output. Although the camera's sensor size is natively 4:3, I suggest keep with a 16:9 aspect ratio so that others can use your footage readily. You should note that 1440 is the default mode of the camera and it resets to this each time you run an update!
Frames Per Second (FPS)
Standard video is at roughly 30 frames per second. That means 30 of the above frames will be shown each second of video that is played. Now if we shoot at 120fps, that means 120 frames are played each second. What is nice about this is during those picturesque moments of jumpsuits flapping in a tight formation, the video editor can show the video at 1/4 of the actual speed thus playing in super slow motion (120/30 = 4).
Most freefall is over in less than 60 seconds. If you are one that turns your camera on early, and keep it on the full jump to landing, you are looking at 2:30-5 minutes of video. So what does this have to do with frames per second? With each step in FPS (30,60,96,120) you are effectively doubling the size of your video and making it more difficult for your processor to handle. So if you are just going to get the freefall of some sick tight formations, shoot at 120fps, but if you are just fun jumping and like to film your whole jump stay with 30 or even 60fps. Your harddrive will thank you!
Field of View (FOV)
The GoPro was originally soley a point of view camera and therefore was looking for the widest field of view. If unfamilar with this concept, you can think of field of view as how much the camera can see from side to side. Since the GoPro 3 camera is so powerful, we are not necessarily looking for the widest FOV anymore, but for the best FOV for our application. Think of it as having a single camera with multiple wide angle lenses. The way the GoPro3 deals with FOV is by cropping and throwing away the sensor data. This is because it has no moving optics. So yes, you lose data, but that is not necessarily a bad thing. The reason being is the GoPro is not great at downsampling footage. So if you are shooting at 720P wide it needs to take those 4K pixels and squeeze them down into 1280 pixels (720P's width). This "compression" can end up having some nasty artifacts that will be seen in the form of jagged lines and sometimes blur. If you are confused about FOV the below diagram may make more sense: (Again from Abe Kislevitz)

Don't go setting your camera to 720P narrow just yet for jumping! Unless you have a sight, a steady head and a strong mount I would not suggest using anything but wide mode in freefall.
Thank you for the lecture, What should I use?
After all said and done this is what I suggest for skydiving:
| Mode | Pros | Cons |
| 2.7K@30fps Wide | Awesome frame grabs, cyrstal clear video. Able to stabilize using your video editing software. My favorite! | Biggest files, doesn't play on some devices. A bit of rolling shutter if you got a shaky head. |
| 1080P@60fps Wide | Good frame grabs, can slow down to half speed My second favorite! | Doesn't play back through some devices, big files for people with tons of jumps |
| 1080P@30fps Wide | Good for everyday jumps, small sizes, good for youtube | Can't slow down, not best of the camera, Possible Rolling Shutter, I would suggest 1080P@60fps to reduce this effect |
| 720P@120fps Wide | Slow down 4x | Big file size, jagged lines |
| 720P@120fps Narrow | Great for ground stunts or people with camera flying experience. Slow down to 4x | Will show shaking and difficult to sight. Use LCD on ground to get angle just right |
| 720P@60fps Wide | Good for debriefing on ipads and just saving space etc | Kinda a waste to use this camera in this mode, but if you are jumping a ton or just producing DVDs go for it. |

I've personally been shooting with the 2.7K lately just because I can afford the extra space and I absolutely love the screen grabs. I was shooting at 1080P 60fps for a while and will most likely go back and forth. When paragliding or doing something more than 5 minutes, I switch the camera to 1080P@30fps since I want to have small files. With all this said, before going on your first jump, make sure you test your camera's settings by playing it back or feeding it through your editing machine.
What about the gazillion other settings?
Below is a listing of how else I have my camera setup
| Setting | Value | Notes |
| Photo Resolution | 12MP | No real reason to use anything else. Photos are easy to delete quickly |
| Continuous Shot | 10SPS | How many stills to take in a second when a photo is taken. Might as well set it to the highest if you are using this mode once in a blue moon. Adjust to your needs. I like taking a bunch of pictures and just sorting through them at the end of the day to find the best one. |
| Burst Rate | 30/3 sec | Find this setting is best for capturing exits from within the plane and landings. |
| Time Lapse Interval | 0.5 sec | Spray and pray! Take two pictures a second during your skydive and sort them out at the end of the day. Adjust to your needs. 2 second interval and above does not have the exposure lock issue. |
| Wireless controls | Wifi Off | Keep the wifi off to conserve battery power. Holding down the wifi button toggles wifi on and off too. |
| Capture Settings | ||
| Upside Down | Off | Unless I mount it upside down on something |
| Spot Meter | Off | Unless I want it to expose in the center of the image. Think shooting through a car window where you want the road to be seen not the insides of the car |
| Video + Stills | Off | Only works in 4:3 aspect ratios and will only take stills once every 5 seconds. I just use screen grabs most of the time anyway |
| Auto Looping | Off | This mode works great if you are waiting for an event to occur and will stop the camera right after it happens. This allows you to continuously record a segment and not waste space where you only need the last x minutes of footage. |
| Protune | Off | If you will be handing the footage over to a pro for color correcting, feel free to turn this on. Do not use protune at night. |
|
Setup Menu |
||
|
Auto Power Off |
Off | Just remember to always manually turn your gopro off. |
|
Time/Date |
Set it! | It is so much easier to find files by date if you and all your buddies have this set properly! |
One other note! Write your name on your camera! These things get lost, misplaced, traded etc. Use a sharpie and at least put your name on it and the battery!
ProTune
Really quick, ProTune does two things:
1) Turns off image processing so you get pretty much the "raw" data from the sensor. This means your footage may not look as nice as it does when its processed from the camera but it does allow someone editing the footage to easily tweak the colors to match other sources and the feel they wish to have for their movie.
2) Because it does not "process" the footage it can shove in more information per second of footage. This means each frame will have more detail than if ProTune was turned off.
In summary, if you are a novice, I suggest ProTune off. If you 100% be color correcting your footage in post production, obviously turn it on.
Where do I go for more info?
As always RTFM! After that, watch some YouTube videos on whatever you are having issues with. I also highly recommend checking out Abe Kislevitz's article on his blog. It really opened my mind on the best modes for the camera and he touches some more on the cinematric 24fps modes and the protune feature which this article does not cover. If you want some information on the inner workings of the camera, check out Scuba Diver Info's writeup. You can also reference our old Gopro HD for skydiving article for various hints on mounting, safety, and jumping with the GoPro. Don't forget to update your Gopro3 camera often and subscribe to GoPro's mailing list!
I heard there are issues with the Gopro HERO3 what are they?
GoPro is great about coming up with fixes and updates for their cameras. With that said, there are some issues that we have seen with the current release. To keep tabs we maintain a current Gopro HD HERO3 Problem List.
In closing
Spend some time with your Gopro Hero3 and really get to know what works best for you. These are all guidelines and hopefully gives you background to figure out what modes to use and when to use them. Please take a second and like us on Facebook to continue to get more great articles like this one and if you ever need camera gear, please think of us!
Show me some footage!
Various Modes (720 120fps and 1080 60fps):
2.7K Belly Jump:
1080P 60fps Low Light: