HYPEYE D PRO EXPANSION KIT INSTRUCTIONS
Thank you for purchasing the HYPEYE D PRO EXPANSION CABLE KIT. This kit was designed for the videographer who wants the most tricked out camera helmet around. It can also be used for custom camcorder setups for any application.

It features:
- Bite/remote switch input to remotely operate the camcorder’s photo mode
- Input from audible altimeter for visual altitude warning indications
- Custom push button interface to enable control of the camcorder via the user’s own push button
Warranty
All products and accessories are sold by Get Hypoxic LLC with no guarantee accepted for defects in every respect. The Makers also refuse to accept any liability on User's part for damage caused by ill-treatment of any product or for personal injuries or equivalents of any kind due to faults in production and material.
Get Hypoxic LLC will, if Buyer rejects the above purchase conditions, reimburse purchase price in full by return of unused product or accessory within 90 days from the original date of purchase.
To obtain warranty service, an original or copy of the sales receipt from the original retailer is required. Online auction confirmations are not accepted for warranty verification, and Get Hypoxic LLC will not replace missing components from any package purchased through an online auction.
Get Hypoxic LLC retains the exclusive right to either repair or replace the unit with a refurbished unit or new unit at its sole discretion.
Contact Get Hypoxic LLC at support@gethypoxic.com
Disclaimer
Get Hypoxic LLC nor its agents, employees, owners, field representatives or dealers accept any responsibility for any loss, injury or death while using our products. The user of our products accepts the risks involved in extreme sports as being inherently dangerous and that sometimes can cause injury and even death.
Tools
- #0 Philips Screwdriver
- Fine bladed knife
- Soldering/Crimp equipment (Only for push button install)
Accessories
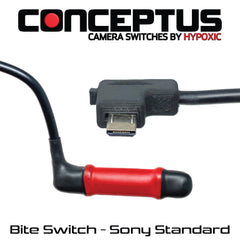
- 2.5mm Stereo/Mono: Bite, Push, or tongue switch (Optional)
- L&B Optima Audible Altimeter (Optional)
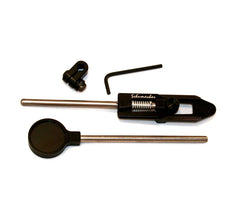
- SPST NO momentary push button switch (Optional)
Installation
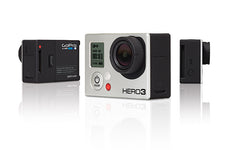
Ensure the HYPEYE D PRO works correctly with your particular camcorder before continuing.
The HYPEYE D PRO EXPANSION KIT must be installed securely for consistent operation. To do this, the case of the HYPEYE D PRO must be removed.
Removing Case
- Locate the 4 screws on the bottom of the case.

- With a #0 Philips screwdriver, completely unscrew all 4 screws. With the 4 screws removed, slowly take off the bottom cover. Do not lose the rubber accessory cover or the 4 screws.
- The setup will look like below

- Locate the accessory header. It is marked “Accessory” on the board.
- Chip off the hot glue from the header with a sharp blade.
- Grabbing the white edges of the loopback cable, remove it from the connector by pulling it as shown by the arrows. Pulling it straight up will damage the circuit board.

- With the loopback cable removed the board will look like below. Store the loopback cable somewhere safe.

- Insert the HYPEYE D PRO EXPANSION CABLE into the header. Note the black wire is on the left. Place a drop of nail polish or hot glue on top of the connector to prevent it from coming out due to vibration. Do not use crazy glue or any other permanent glue.

- Place the top cover back on. Position it so the bigger hole goes over the 3.5mm debrief jack.

- Fit the screw holes so they go through the board like shown below.
- Scrunch up the extra wire into the case so that the case plastic edge touches the cable insulation and not the individual wires themselves. Make sure the cable fits in the cable cutouts like shown.

- Remove the accessory plug cover and store.


- Put the bottom cover back on and screw it back down. Do not over tighten the screws.

- The finished product will look like below. Ensure the cables are all seated properly.
- Test that the HYPEYE D PRO controller still operates correctly by controlling the camcorder via the HYPEYE D PRO’s push button.


Usage
Audible Altimeter

Connect the audible altimeter as shown below. Make sure the connector is firmly inserted.
The connection must be tested! To test the connection, activate the “Test Alarm Sounds” feature of the audible. The 3 dedicated Red LEDS will blink.
Note: For the user’s protection these LEDs blink independently of the camcorder being powered. Do not use the HYPEYE D PRO as your sole altitude indication method!
This indication system can be hooked to any 3.3V accessory using a MMCX connector with the shroud as ground. Contact Get Hypoxic for information regarding your specific application.
Photo Switch


The external photo switch allows the user to remote activate the camcorder’s built-in Photo Feature. This feature works in the confines of the connected camcorder.
To install, attach a 2.5mm remote switch to the 2.5mm jack as in the below picture. This example is of a tongue switch.
To test, attach the HYPEYE D PRO to the system and turn on the camcorder. Switch to Photo Mode by double clicking the push button. Depress the remote switch. The camcorder will capture a photo and the HYPEYE D PRO will blink. This blink confirms a photo request has been sent, but it does not confirm the photo has been captured.
Dependent on the mode of operation the camcorder will capture photos differently. It is suggested to try taking stills in each mode to get familiar with how the camcorder in use operates.
|
Mode |
Photo Usage |
|
Video Standby |
Memory-limited number of photos in lower resolution |
|
Video Record |
Camcorder-limited number of photos in lower resolution. May be limited per recording session |
|
Photo |
Memory-limited number of photos in high resolution |
External Custom Switch
(Advanced users only!)
In some applications, the user may wish to mount the controller switch away from the HYPEYE D PRO or use his or her own switch. The expansion kit allows for this by providing a three-wire interface. The wires are hidden under shrink tubing by default. Pull off the shrink tubing to expose the wires.
|
Wire |
Function |
|
Red |
Input |
|
White |
Internal Switch |
|
Yellow |
External Switch |
The Red and White wires are tied together to provide a loopback for the internal switch. By cutting this connection, the internal switch will be disabled. Most users using this feature will cut this connection and attach a switch in-between the Red and Yellow Wires. If this connection is not cut, and the switch is connected between the (Red/White combo) and Yellow, both switches will control the camcorder.
Example
Disabling the internal switch and connecting an external switch:
- Remove the shrink tubing.

- Cut and strip the wires.

- Cut the white lead and remove the shielding

- Attach the two wires between a momentary normally opened (NO) push button.
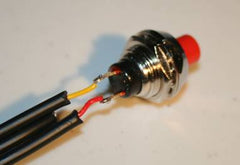


The push button now replaces the push button on the HYPEYE D PRO. By adding extra wire, this button can be mounted far away from the camcorder. Notice that the button on the HYPEYE D PRO is now disabled.
Customizing
Some users may wish to customize their HYPEYE D PRO EXPANSION KIT for his or her requirements. The audible altimeter cable and the bite switch can be simply cut off at the strain relief without any issues. The external push button connection can be shortened, but it must have the Red and White leads connected together. This provides the necessary loopback needed for the internal push button to operate.

Feel free to email Get Hypoxic LLC with any feedback, application, or install question you have about the HYPEYE D PRO EXPANSION KIT at support@gethypoxic.com.