Sony a6000, a6300, a6500 Settings for Skydiving
Posted by Mark Kirschenbaum on
It's spring time, which means skydivers all around the Northern Hemisphere are gearing up for the new season. With this, many are getting rid of their old, heavy SLR, and moving to a mirrorless solution.
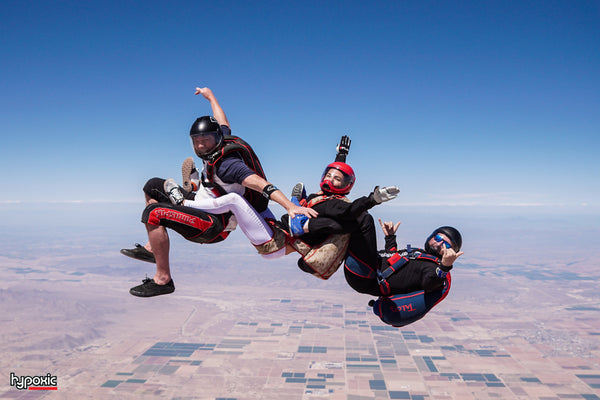
We've bought into the Sony platform a few years ago and recently started shooting with the Sony a6000. The results have been amazing! Thus far Parachutist & Blue Skies Mag have published: 2 centerfolds, 1 full page, a calendar shot, and more than a dozen photos all shot by us with this tiny little camera! [A ton more and a cover since this was written]
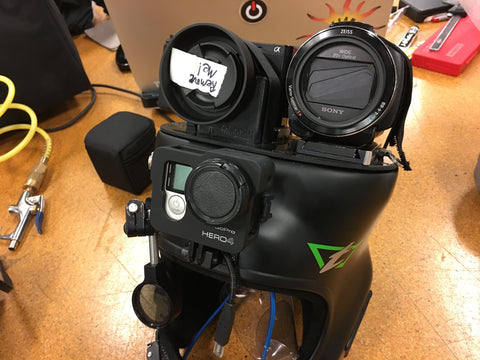
I'm still learning the platform, but often get the question, "what are the best settings for skydiving?" Today, while testing out the Hypeye Alpha prototypes, I took a step back and wrote up this guide. It's the culmination of a lot of missed shots, other photographer's insights, my observations, and some research. Take this as a starting guideline and not necessary rules. Your conditions and settings may vary. Feel free to give us feedback and recommendations via email or Hypoxic's Facebook Page.

My Settings
I currently use a Sigma 19mm/f2.8 Lens Sony 20mm Prime on the a6000. Sony 16-50mm & Sigma 19mm are popular skydiving lenses too and will have fairly similar settings. Mind you I'm generally shooting "fun" jumps and formations. [Update] I switched to the Sony 20mm since it seemed faster to focus for exit shots.
| Setting | Value | Reason |
| Shooting Mode |
What I use Others Rick Winkler Suggests |
In Aperture Priority and Shutter Priority modes we would get inconsistent results. By manually setting our values, and letting the ISO automatically adjust, we get workable photos in most conditions no matter our orientation to the sun. The faster shutter speed and the aperture backed off a bit, allows for bigger formations to be in focus and reduces blur due to flapping jumpsuits. Back in my Canon days I would never go above 1/800, seems the Sony is so much more sensitive to light hence the 1/1000> speeds. I'm typically shooting F4.5 1/1250 in Arizona. F4.0 1/800 or slower in overcast. F6.3 and up you can get away with manual focus. Check out Depth of Field (DOF) calculators for your lens. Read up on it, it's important. |
|
Shooting Mode |
Continued.... |
For sunset, sunrise, and overcast I'll take some practice shots on the wings during the ride to altitude. I the look at the histogram to ensure the setting spans the whole color line. I set ISO to AUTO to allow for some "wiggle" room if the exposure is off a bit. |
| ISO |
Auto |
ISO on a CMOS sensor is a gain setting. The higher the ISO, the noisier an image becomes. A lower ISO will reduce noise but at the cost of losing some information in the shadows. I like AUTO since it prevents completely lost photos due to exposure issues from the settings. It's recommended to set this limit from 100 to 800 for skydiving. UPDATE: I stick to ISO 100 or 125 more of the time. |
| Exposure Compensation | +0.3 to +0.6 |
We've had a recommendation to increase the exposure compensation 1 to 2 increments when ISO is set to Auto. This should brighten up the faces and jumpsuits that are often dark in front of a blue sky. To achieve this, press down on the menu wheel and selecting +0.3 to +0.6. (+0.5 increments is also an option in the settings) Update Super helpful on this platform! |
| Image Size / Quality | Large / Fine / JPG only when delivering straight to customer RAW if doing post operations on a fast computer. |
In a 24 Megapixel JPEG there is a ton of color information. We've found there is no need for sunny outdoor shots to record in RAW if you are going straight to customer. The resulting JPEGs have so much color information that post processing can still be done effectively especially. This is especially true if shot in a neutral or standard mode. If you are doing post, you might as well shoot in RAW. |
| Creative Style |
Neutral if I will do post processing on JPG |
Most customers like popping colors for their Instagram and Facebook pages. Might as well have the camera do the post processing if you aren't. |
| Drive Mode | UPDATE Continuous Shooting -MED |
Super important! Update: Changed to a Sony 20mm and now it's fast enough to shoot on Medium speed. Unless you are shooting in manual focus, the continuous shooting mode should be set to LO (2.5fps) for holding down burst shots to "refocus" inter-sequence correctly. When it's set to medium (6fps) or high (11fps), we will often miss the exit shot due to out of focus! The camera will only "pick the object" at the start of each burst section. From then on, it will continuously focus correctly. However, if it fails to pick the object at the start, that burst sequence will be blurry. We will test a continuously focusing switch and let you know our results. |
| Focus Mode | Continuous Focus | Automatic Focus will automatically determine the scene and switch between continuous and single shot focus mode. We might as well just set it to continuous for skydiving. |
| Focus Area | Center or Wide |
This prevents the plane from being in focus but not your subject. This also allows for bigger formations or the subject to be slightly off center to get into focus. NOTE: Zone focus really slows down continuous shots. |
| Movie AF drive speed/ Track Duration | Do not care | We are not using for movies, this setting does not matter to us |
| Metering Mode | Multi | Seems to work well to get the subject and background metered properly. In my manual setting, metering mode just plays into the Auto ISO calculation. |
| White Balance | Auto / Cloudy |
Camera's now days are fairly good at WB calculations. The auto setting seems to work fairly well for most conditions. Best part of leaving it to auto is I don't forget about it the next day after a night of party photos. With that said, we can always tweak the white balance in post if necessary. Multiple people have recommended setting the WB to cloudy to make the images seem warmer throughout the day. This will compensate for too much "blue" in the image. Just remember to change it back when the lighting changes. We'll give this a shot. Update I'm sold on the "Cloudy" setting! |
| DRO / Auto HDR |
DRO off |
We need to test out this setting more on jumps as it may add noise to the blacks. However, DRO (Dynamic Range Optimized - Auto) will help bring out the shadows in often black jumpsuits. |
| Lock On AF |
Off |
This is a setting that only makes sense when using the camera hand held. |
| Smile Detect |
OFF! |
Turn this setting off for better focus control. |
| Auto Review |
Off |
Review getting annoying when the camera is offset on my helmet. Use your judgement here. |
| Pre-AF |
Off |
After reading forums, most suggest having this turned off. So I have. Haven't seen much difference either way. |
| AF w/ shutter |
On |
This will focus when fired via a bite switch. This can be turned off if you are manually setting your focus. |
| AEL w/ Shutter |
Auto |
This equates to the ISO calculation |
| e-front Curtain Shutter |
On |
Faster for the first photo |
| Pwr Save Start Time |
5 Minutes |
I don't turn my camera on until I hear a cut. |
| Remote Control |
Off |
This is for IR remote, might as well save the power |
| USB Connection |
Mass Storage |
Easier to retrieve photos and videos |
| Custom Buttons |
C1 - Drive Mode |
This is personal preference |
Nifty Trick
Set Dial / Wheel lock to "Lock" then hold the 'Fn' button down (~5 seconds) to prevent the wheel dials from changing your settings. Say goodbye to gaffers tape. Thanks for the suggestion Daniel Harmens!
Other Notes
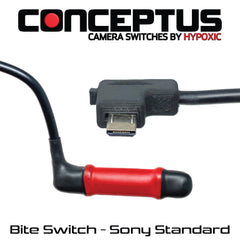
- Be sure to get a 90 degree bite switch adapter! The Sony Multi Port is made up of 15 connections and is weak. One good hit of your riser or the door and we've seen the camera become worthless. Invest the money, get a 90 degree connector and baby this connection.
- For a really good reference, download Sony's Focus guide for the a6000. It's an invaluable read.
- Lock the wheels once your settings are set. See the above trick!
- Take sometime, read up, and mess around with a DOF calculator such as this for you particular camera and lens.
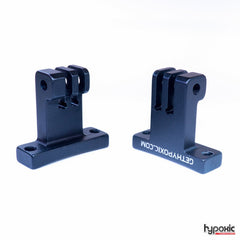
If you found this useful, please share and support HYPOXIC for your camera needs. Take a look at our Sony 90 degree Adapter and switches.
Thank you,
-Trunk
Share this post
- Tags: a6000, camera helmet, how to, skydiving, sony

